fencing questions
Best Type of Fencing for Gardens

You don’t get a first-class fence without first-class posts. Get your posts set and standing tall and proud and any fence will not only look better but last longer – whatever fencing material you choose. If it sounds easy, it is. Providing always that you have the right preparation, and use the right materials, it can happily be a one-person job.

It’s as simple as one, two, three, four, five, stick…
You need six things for the perfect fence post:
Before you get into the spade work it’s best to make sure there is no underground pipework or cable ducting. Generally, if you’re replacing a fence that’s been there before, you shouldn’t have anything to worry about. But caution is always best.
If you’re installing a whole row of posts get a piece of string, put a stake in the ground where the first post will go, and then make a ‘stringline’ between the first and last posts and mark out the position of each post in between with a cross on the ground with something like line-marking paint.
Make sure to check that the centre of your crosses all aligns with the stringline.
First dig your hole…
The quick rule of thumb here is that what’s below ground should be about a third of what’s above ground. That means if you’re erecting a 6-foot (1800mm) fence you need an 8-foot (2400mm) fence post with a two foot deep hole. The width should be around 3 times the diameter of the post – so with a 4 inch (100mm) post you need a hole with a diameter of 12 inches (300mm).
You might be pushed to do that with the average garden spade. Buying a special post-hole digger will almost certainly save you time and make life easier.

Your fence posts
Simple math here – 6-foot (1800mm) fence, 2-foot hole (600mm), therefore post needs to be 8 feet long. If you’re using a timber fence post, it’s worth considering adding post savers or treating the bit that you’re burying to stop it from rotting.

Post concrete
Here you have a lot of choice. Basically, post concrete is a ready-mixed and finely blended, kiln-dried, mixture of cement and ballast. The main variable is the size of the ballast and how that affects setting. It comes under a variety of names such as Postcrete, Ready Mix or Postmix.

We produce our own FENCEMATE post concrete, which comes in three formulas:

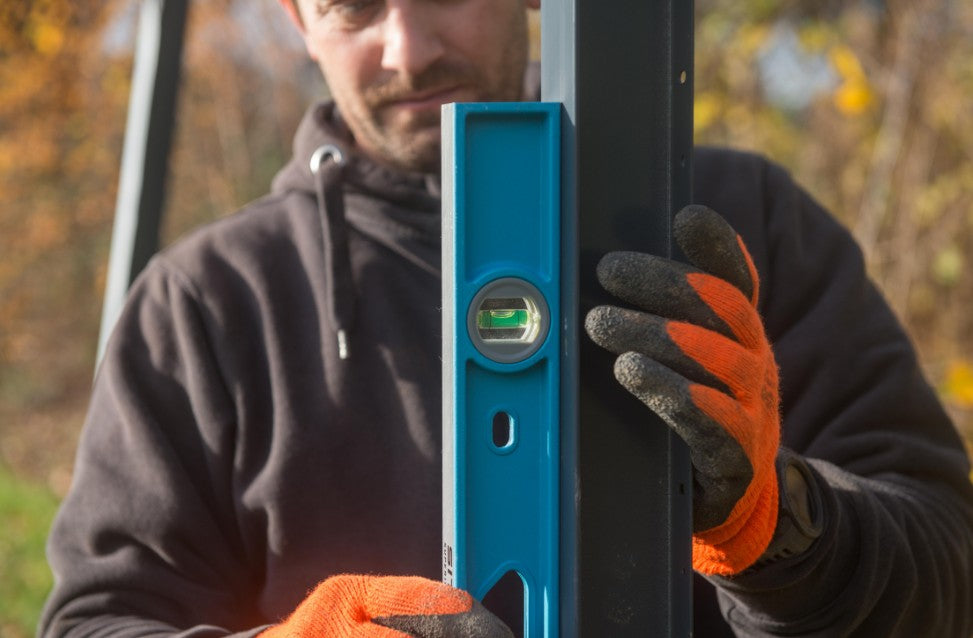
It’s important the mix doesn’t go off immediately as you generally need to move the post around a little to make sure it’s vertical and in line with the posts either side (this is where the spirit level comes in handy – the longer the better). Then again you don’t want to have to hang around too long for it to set, there’s only so much tea even a professional builder can drink!
Water
A 10-litre watering can full of tap water will do the job perfectly.

On your marks, get set, dig …
Here’s the Birkdale 101 Fence Post Installation Guide

At some stage you have choose what level of concrete to embed your post in:
Mask up and take care
Concrete dust can be an irritant so it’s always best to wear a face mask and gloves.
DIY concrete cocktail mixology …
Other types of concrete are available, and you can always mix it yourself to your own recipe. The thing you need to be aware of is setting time. Special formula post mix concrete will go off quickly – once it’s set it will be secure enough to hold up your fence panels. In contrast, regular concrete can take hours (sometimes days even) to firm up.

It’s as simple as one, two, three, four, five, stick…
You need six things for the perfect fence post:
- A hole in the ground
- A fence post
- Post concrete
- Water
- A spirit level (sort of optional, but highly recommended)
- A stick – every post builder needs a stick!
Before you get into the spade work it’s best to make sure there is no underground pipework or cable ducting. Generally, if you’re replacing a fence that’s been there before, you shouldn’t have anything to worry about. But caution is always best.
If you’re installing a whole row of posts get a piece of string, put a stake in the ground where the first post will go, and then make a ‘stringline’ between the first and last posts and mark out the position of each post in between with a cross on the ground with something like line-marking paint.
Make sure to check that the centre of your crosses all aligns with the stringline.
First dig your hole…
The quick rule of thumb here is that what’s below ground should be about a third of what’s above ground. That means if you’re erecting a 6-foot (1800mm) fence you need an 8-foot (2400mm) fence post with a two foot deep hole. The width should be around 3 times the diameter of the post – so with a 4 inch (100mm) post you need a hole with a diameter of 12 inches (300mm).
You might be pushed to do that with the average garden spade. Buying a special post-hole digger will almost certainly save you time and make life easier.

Your fence posts
Simple math here – 6-foot (1800mm) fence, 2-foot hole (600mm), therefore post needs to be 8 feet long. If you’re using a timber fence post, it’s worth considering adding post savers or treating the bit that you’re burying to stop it from rotting.

Post concrete
Here you have a lot of choice. Basically, post concrete is a ready-mixed and finely blended, kiln-dried, mixture of cement and ballast. The main variable is the size of the ballast and how that affects setting. It comes under a variety of names such as Postcrete, Ready Mix or Postmix.

We produce our own FENCEMATE post concrete, which comes in three formulas:
- Standard Coarse Aggregate – sets in 10-15 minutes
- Premium Fine Aggregate – sets in 5-10 minutes
- Premium Coarse Aggregate – sets in 5-10 minutes

It’s important the mix doesn’t go off immediately as you generally need to move the post around a little to make sure it’s vertical and in line with the posts either side (this is where the spirit level comes in handy – the longer the better). Then again you don’t want to have to hang around too long for it to set, there’s only so much tea even a professional builder can drink!
Water
A 10-litre watering can full of tap water will do the job perfectly.

On your marks, get set, dig …
Here’s the Birkdale 101 Fence Post Installation Guide
- Dig your hole
- Half fill the hole with water
- Insert the fence post
- Pour in the dry post concrete until the mix is level with the water
- If any dry powder is still visible add a little more water as required
- Take your stick and stir the mix in the hole to release any air bubbles
- Adjust the post until it is upright and totally vertical
- Allow to set

At some stage you have choose what level of concrete to embed your post in:
- It can come slightly above the level of the ground to avoid water collecting around the base of the post
- Alternatively, you can choose to leave it 50mm lower than ground level then fill it with topsoil at a later date then seed it with grass
Mask up and take care
Concrete dust can be an irritant so it’s always best to wear a face mask and gloves.
DIY concrete cocktail mixology …
Other types of concrete are available, and you can always mix it yourself to your own recipe. The thing you need to be aware of is setting time. Special formula post mix concrete will go off quickly – once it’s set it will be secure enough to hold up your fence panels. In contrast, regular concrete can take hours (sometimes days even) to firm up.
DuraPost® fencing systems
Create Extraordinary Spaces
DuraPost® steel fence posts and composite fence panels. Find out why they are the ultimate fencing system.


